


Avery Printable Heat Transfer Paper for Dark Fabrics, 8.5″ x 11″, Inkjet Printer Compatible, 5 Sheets of Iron On Transfer Paper, Great for Custom Shirts, Uniforms, Gifts, and More (3279)
Original price was: $20.26.$14.99Current price is: $14.99.


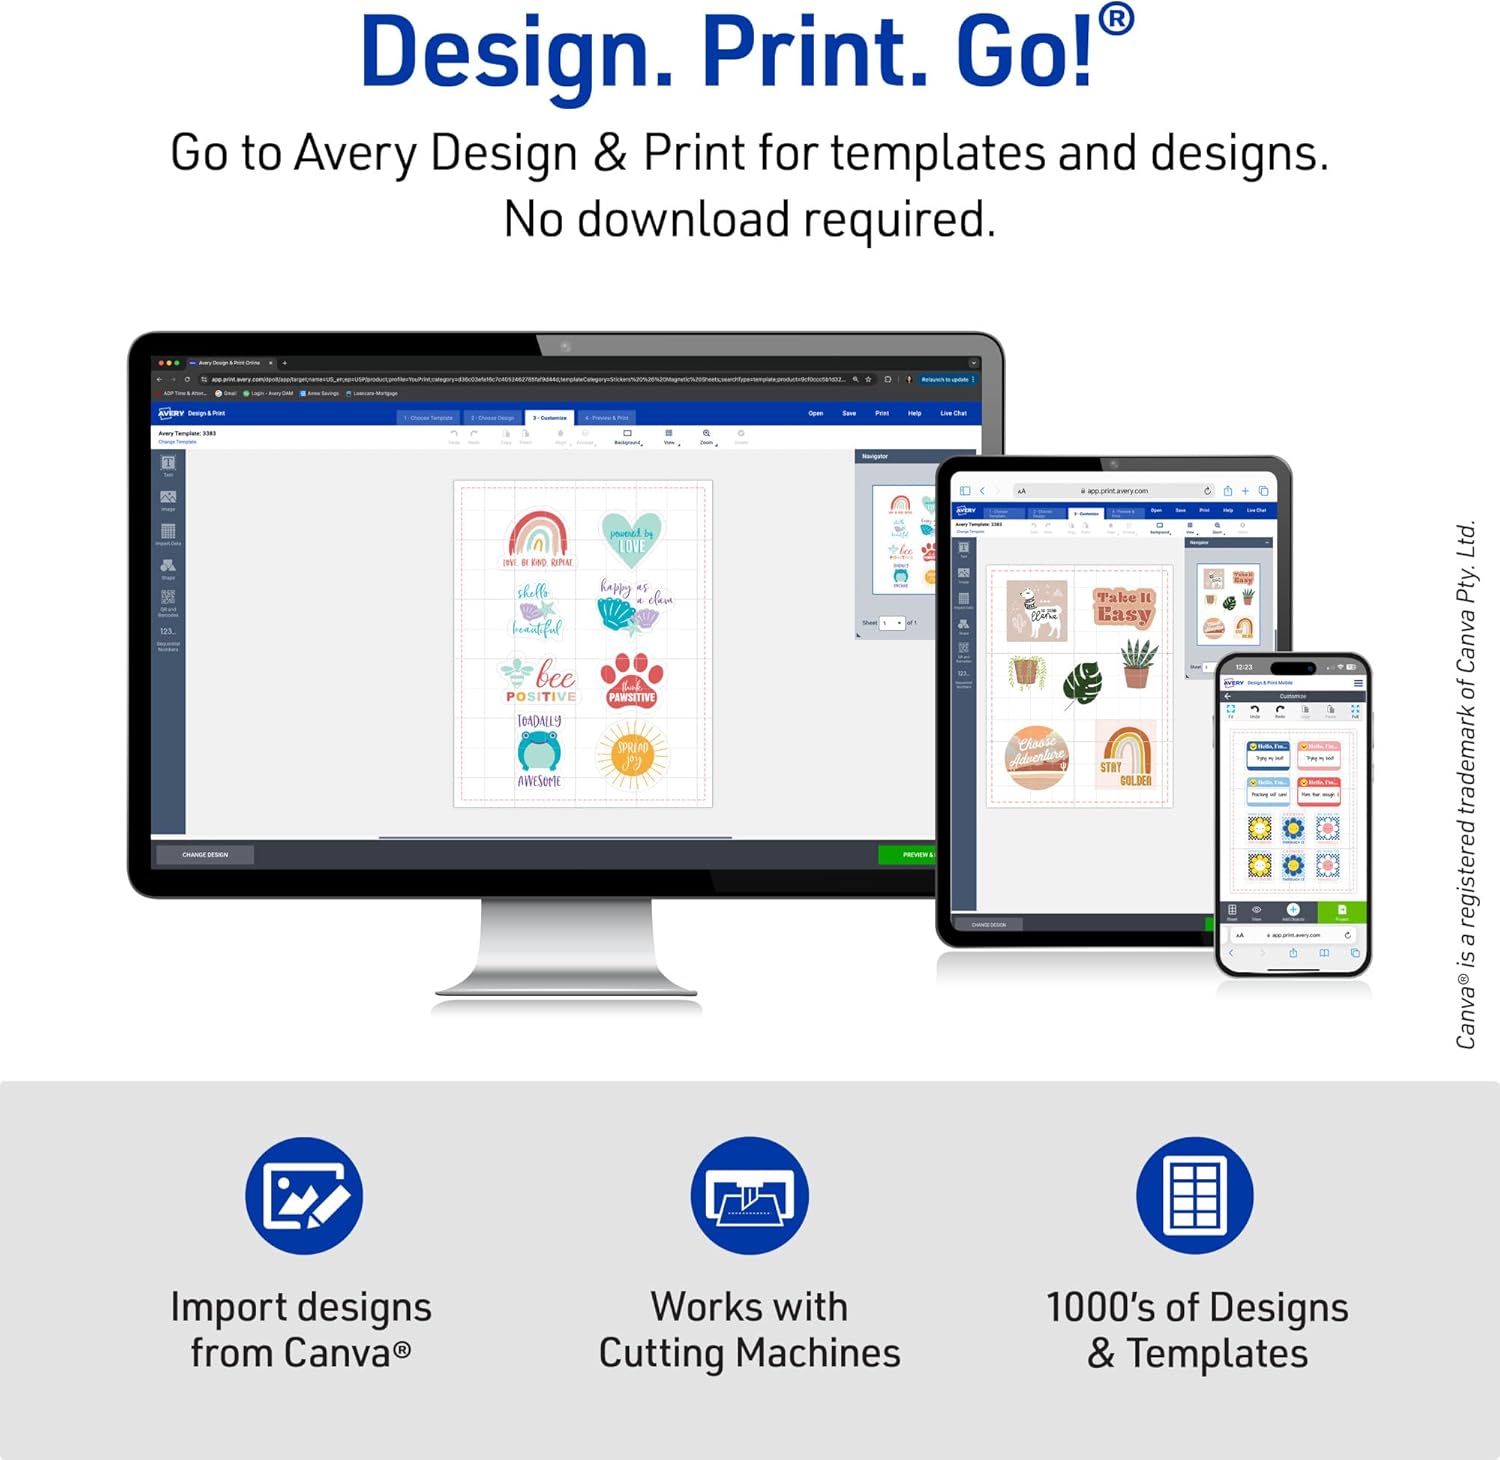

Whether you’re crafting for fun or branding your small business, Avery 3279 heat transfer paper for dark fabrics makes it easy to create personalized shirts, DIY décor, custom gifts, branded swag, and more. Designed for black or dark-colored 100% cotton and cotton/poly blends, this printable heat transfer paper features a Color Shield formula for bold, fade-resistant designs that won’t crack or peel for up to 20 washes. Plus, you can print right-side up, no need to mirror your image, saving time and simplifying the process. Use your own photos, artwork, logos, or text to design custom iron-on transfers for events, family trips, or small businesses. For fast, professional-looking results, you can also personalize projects using Avery Design & Print Online, which offers a wide range of templates and easy editing tools. Once printed, simply cut your design with scissors or use a Cricut, Silhouette, or other cutting machine for clean, precise edges. Heat transfers apply smoothly to fabric using a household iron or heat press. Each project is a chance to showcase your creativity and bring a personal or professional touch to every piece. This pack includes five 8.5″ x 11″ sheets of iron-on transfer paper for inkjet printers.
100 Cotton
Design and print your own iron-on transfers on 8.5″ x 11″ printable transfer sheets that are great for custom branded apparel, home décor DIYs, personalized gifts, and more
Designed for dark-colored cotton and cotton/poly fabrics, this printable iron on transfer paper features a Color Shield formula for vivid, fade-resistant prints that last up to 20 washes
Compatible with standard irons and heat presses, Avery transfer paper makes custom projects simple, and also comes with step-by-step instructions for smooth, successful transfers
Print detailed designs on heat transfer paper for inkjet printers and cut them to size using scissors or an electronic or die-cutting machine for professional-looking results
Customize your printable heat transfer paper using Avery Design & Print Online with your own images, logos, and text, or choose from the available templates and designs


Amazon Customer –
Works Perfectly on Dark Fabrics!
This Avery printable heat transfer paper is amazing! The colors come out vibrant and clear, and it sticks really well to dark fabrics without peeling or fading. The instructions were easy to follow, and the transfer held up nicely after washing. Perfect for custom t-shirts and creative projects—definitely a must-have for DIY lovers! Used it on my hat!
lorielle –
Best for DIY home projects.
Worked very well and colors were bright and bold and no bleeding of the ink.
MattBianco –
Saved A Project Online T Shirt Printers Could Not Handle
Problem: third grader wanted to do a piano/singing tribute to Bowie, and online printers would not print the design sought due to copy right, though we had modified some of the graphics. Their position was understood. Then I discovered the Avery transfer paper. I bought both the dark and the light color transfer papers not knowing which the little guy would prefer at the end.Here is the upshot, working with both the light and dark paper:• Wash and dryer dry your t shirt/fabric first. A shrunk fabric works best• the more time you spend prepping and the closer you follow the instructions the better your end product• don’t be afraid of force (pushing down) and heat• Trimming the extra paper on the light paper minimizing areas that will be clear but somewhat glossy• Trimming the extra areas on the dark paper avoids transferring the color white to the fabric• Through trial and error I figured out it is better to avoid sharp corners to make them round, reducing the risk of corners peeling off• The side of the paper you print on is the white side for both dark and light paper, so make sure you know how to load the paper in your inkjet printer• Your final print area can be larger than a sheet as you can cut images/words from the paper and space them or use them elsewhere on the shirt (for instance, arm badges can be printed in a corner of the same sheet)Trick:• To avoid damage to the reverse side graphics, if you do a front/back design, use a large cutting board or a piece of flat wood slide it in the t-shirt that way the wood sits between the front and back. This also solves the issue of both sides of the t-shirt not being perfectly flat/ironed before you startLight Color Paper:• You need to print in reverse as the image is reflected back on the fabric. I used Powerpoint and flipped the images and writing and avoided the online Avery tool for doing so• As mentioned before, you don’t have to cut very precisely as you only leave behind gloss/clear where you don’t trimDark Color Paper:• You DO NOT need to print in reverse• You need peel of the printed paper BEFORE initiating transfer with an iron -I wasted one sheet not bing careful• The portion you don’t trim transfer as white and you can create a border, rough or smooth, as I did with the front of the dark t shirt• Peeling the transfer portion from the t shirt before ironing is difficult….I used tweezers and eventually I managed to peel off the backing• You use an included parchment paper over the peeled paper to press the image onto the fabricFinal Impressions:• Don’t expect professional grade printing• Recognize these are not permanent and are intended for fun and event needs• Mistakes and rough edges on my work is my own haste getting in the wayThis met my needs, to have a front/back t-shirt design on both dark and white t-shirts, using the appropriate paper for each color.**** UPDATE *****Both the white and black t shirts have been washed about 15 times each by now. And, they still look very nice.
Paul –
Color all faded after just a couple of months
This printable HTV is easy to use and super compatible with my inkjet printer. I have been super impressed with printing on it and (mostly) applying it. The one downside when applying is if you preheat the item you’re applying it to then when you go to put this printable vinyl on it, the edges start to curl which can be frustrating. It can even ruin it if it curls under and gets stuck to the other side. Other than this, it applies easily with my Cricut heat press and seems imbed well in the fabric.My main complaint is that I customized some masks for a family member about 3 months ago and the color has completely faded off the printable vinyl already. I understand that these can’t really be washed inside out to protect the vinyl, but it’s disappointing that it didn’t last longer. If the design hadn’t been super intricate I would just use regular heat transfer vinyl in place of this stuff. Because of this, I will be avoiding using this product for any items that I create for my business and be sure to tell family/friends up front that it probably wont last very long if they insist on too detailed of a design for my regular HTV and Cricut.
S K Y –
Wash the shirts, do not print in reverse, peel the back first !!! (and more)
These work really well, fourth time we are using this! A few tips for you, especially since the instructions leave a bit to be desired.1) WASH THE SHIRT FIRSTI forgot about the washing of the shirts ahead of time. The first time we used these the shirts are still hanging in there after about two years and multiple washes. The next two times we forgot to wash the shirts, the iron ons looked great but are peeling a bit already.2) DO NOT PRINT IN REVERSE, THIS IS NOT AN IRON ON TRANSFER! THINK OF IT MORE LIKE AN IRON ON PATCH!Meaning: What you print out is what you will see EXACTLY on your shirt. The ink does not transfer to your shirt. if you’re not sure what that means, do you know those little kid toy tattoos that you peel, apply to skin, and then put a wet sponge on the back of the tattoo to get the ink to “transfer” to the skin (and it does it in reverse of what you see). That is a transfer. This is more like an iron on patch, but instead of a patch, it is what you print out on the printer sheet.3) PEEL THE BACKING FIRST!Because the “iron on patch” will be stuck to the surface it is on. If you do not peel the backing, then your print will be forever sealed to the backing. You want it sealed onto the shirt. Fortunately, the back of the sheet has numerous pieces on it, not just one big piece, so I was able to cut the shape of the heart on my transfer and still was able to peel it quite easily.4) Use the white sheet included in between the iron and the printable.I think otherwise you may discolor your shirt with all the heat from the iron5) 3 minutes, not a lot of pressure, repeatedly going over the entire printable esp the edgesI did not use anything close to a lot of pressure, I think that also may discolor your fabric. Just fairly light even pressure over the course of 3 minutes, not staying in any one place too long, over and over and over6) Let the surface cool down a bit after each ironMostly because otherwise the next shirt will get hot when you put it down and it’s waiting and you don’t want to accidentally have your iron on printable get heat sealed any little bit before you apply the iron. Just to be on the safe sideGreat product!!!
Adriana Batiz –
Muy buen producto
M.A. Minehan –
Really like the quality finish and look of my t-shirt designs on all my tests so far using the Avery products
Axaltoryd –
Bon papier transfert, je n’ai pas eu de difficulté à l’utiliser (en utilisant le site web d’avery), les couleurs sont très belle lorsqu’on configure son imprimante dans la plus haute qualité.
Alex Beltwomen alt –
Didn’t realize this, disappointed, instant 5 stars.
Maryam –
The quality is so good and the peeling is so easy i liked it